
How to Choose the Right Arched Glass Door?
Choosing the right Arched Glass Door involves more than admiring its graceful curve. The opening must suit the wall, climate, traffic, and daily habits. A narrow arch can create a refined entrance, while a wide arch can flood a room with daylight. It can also expose poor planning quickly.
The U.S. Department of Energy reports that windows account for roughly 25% to 30% of residential heating and cooling energy use. Glass doors share many of those performance concerns, including heat gain, air leakage, and solar exposure. NFRC guidance recommends comparing U-factor and Solar Heat Gain Coefficient ratings before selecting a glazed product. Lower U-factor values generally indicate better insulation, while SHGC should match the local climate and window orientation. These numbers matter, but they do not tell the whole story.
Look closely at the frame, glazing, seals, hinges, threshold, and drainage path. A beautiful door that drags across the threshold is not a successful installation. The 2024 Houzz & Home Study also shows continued homeowner investment in renovation projects, making durable design choices increasingly important. However, style-led decisions can still overlook maintenance and accessibility. That mistake is common. Measure the rough opening carefully, confirm the arch radius, and review local building requirements with a qualified installer. The best choice balances appearance, thermal performance, security, ventilation, and long-term service. It should feel effortless in use, not merely impressive in photographs.
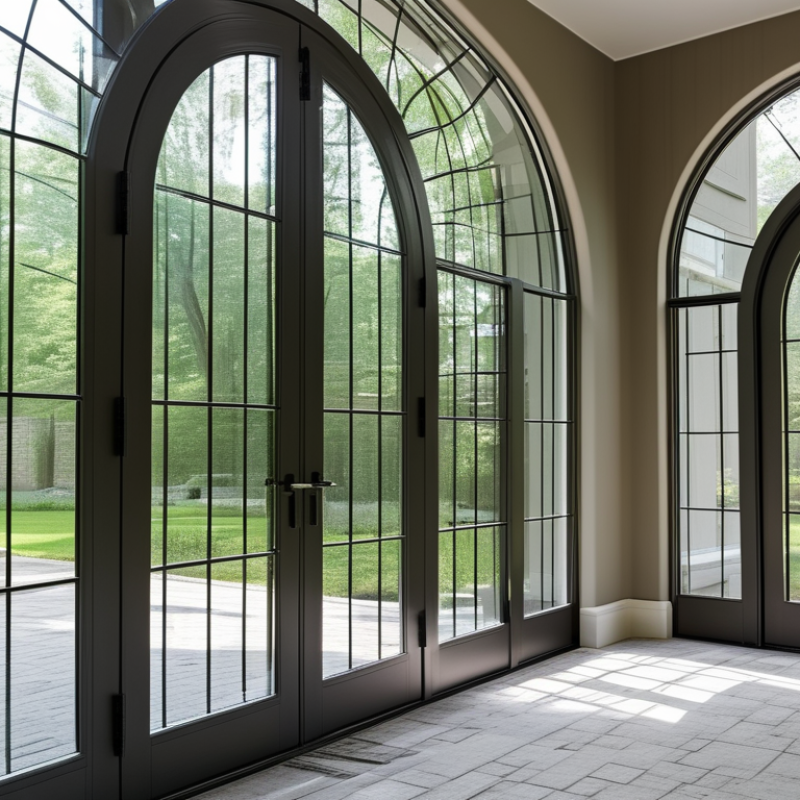
Define Your Arched Glass Door’s Purpose and Installation Location
Before choosing an arched glass door, define its purpose and installation location. A front entry door should welcome visitors, control drafts, and support daily security. An interior door may focus more on light, privacy, or visual connection. These goals change the glass type, frame material, and opening direction.
Measure the opening at several points, not only across the top. Older walls can shift, and an arch may not be perfectly symmetrical. I have found that small measurement errors create expensive installation problems. Check nearby furniture, floor levels, moisture exposure, and available clearance. Bathrooms and outdoor areas usually need stronger privacy and weather resistance. Confirm local building requirements, safety glazing rules, and accessibility needs with a qualified professional.
Tips: Mark the door swing with tape before ordering. Test morning and evening light. Ask how water will drain. Leave space for future adjustments.
A sunny hallway may suit clear glass, while a bedroom entrance may need textured or frosted glass. Consider how the door looks from both sides. The arch should fit the room’s proportions, rather than becoming an isolated feature. A trusted installer should inspect the wall structure and explain the hardware choices clearly. Do not rely on attractive drawings alone. Real walls are rarely perfect.
| Primary Purpose | Recommended Installation Location | Suitable Door Configuration | Glass Selection | Privacy and Light Control | Important Installation Considerations |
|---|---|---|---|---|---|
| Create an impressive main entrance | Front entry, foyer, or covered porch | Single or double hinged door with a fixed arched transom or sidelights | Tempered safety glass; laminated glass may be considered where additional security or noise reduction is needed | Clear glass provides the most daylight; low-e coating can improve energy performance | Verify the rough opening, exterior exposure, drainage, weather seals, and sufficient clearance for the door swing |
| Connect an interior room with a hallway | Living room, dining room, study, or home office | Single hinged door or a pair of narrow hinged doors | Tempered clear glass for visibility; laminated or textured glass for improved privacy | Frosted, acid-etched, or patterned glass reduces visibility while still transmitting light | Check nearby furniture, wall switches, trim, and the required latch-side clearance before selecting the handing |
| Separate a bathroom while preserving natural light | Primary bathroom, powder room, or dressing area | Single hinged door with a privacy latch; a framed design is often easier to seal | Tempered obscured glass, such as frosted or rain-pattern glass | Obscured glass limits direct views; curtains or blinds can provide adjustable privacy | Use moisture-resistant hardware and finishes; allow ventilation and avoid door arrangements that block fixtures |
| Brighten a walk-in closet or dressing room | Bedroom-to-closet connection or dressing area | Single hinged door or compact pivot door, depending on available floor space | Tempered clear, lightly tinted, or frosted glass | Frosted glass offers privacy; clear glass maximizes visual openness and daylight | Measure the full opening height, including the arch, and confirm that the door does not interfere with storage units |
| Improve daylight in a narrow corridor | Hallway, passageway, or transition between rooms | Single glazed door with an arched upper panel or a fixed arched glazed opening above the door | Tempered glass; laminated glass is useful when sound control is a priority | Clear glass supports borrowed light; translucent glass provides more visual separation | Confirm wall structure, trim depth, and the location of electrical wiring or plumbing before cutting the opening |
| Create a flexible indoor-outdoor connection | Patio, garden room, sunroom, or covered terrace | Arched-top hinged doors or a custom door paired with fixed glazed panels | Insulating double glazing with low-e coating; safety glass is required for hazardous locations | Low-e glass helps reduce heat transfer; solar-control glass can limit excessive solar gain in sunny exposures | Consider wind exposure, threshold height, water management, frame movement, and compatibility with the surrounding wall system |
| Enhance a commercial or hospitality entrance | Restaurant, boutique, reception area, or event venue | Double hinged doors or a door with fixed arched sidelights, subject to local accessibility requirements | Tempered or laminated safety glass, selected according to impact and security requirements | Clear glass improves visibility and wayfinding; decorative films can add privacy or visual branding without using company data | Confirm required door width, accessible thresholds, opening force, exit routes, hardware durability, and local building-code compliance |
| Increase privacy in a bedroom or private suite | Bedroom entrance, guest suite, or private lounge | Single hinged door with a solid lower section and an arched glazed upper section | Obscured tempered or laminated glass | Textured, frosted, or tinted glass limits views while allowing moderate daylight | Confirm acoustic expectations, latch privacy, door sweep requirements, and whether the arch aligns with existing interior trim |
| Preserve a traditional or heritage-inspired appearance | Period-style home, renovated entry hall, or classic interior | Framed arched door with divided-light panels or a decorative arched transom | Safety glass with simulated or true divided-light detailing, depending on the design and regulations | Clear or lightly textured glass maintains character while controlling visibility | Match the arch radius, frame profile, hardware finish, and surrounding millwork; check whether preservation rules apply |